

Expense Approval Workflow for Creative Studios and Freelancers
An expense approval workflow is the route a spending request takes from the person who wants to spend to the person who signs off, and then to payment. For a creative studio, start with a short rule about who approves what and name a backup for every approver. Give both people the project budget so they can check what the request would leave in the cost line and how it would affect the planned margin.
This guide is for freelancers who hire subcontractors, small agencies, and project managers who sign off on stock licenses, print runs, ad spend and contractor invoices. It gives you the steps, an example approval matrix you can copy, a one-page policy outline and the places where approvals usually stall.
TL;DR
- Separate four things: the workflow (the route), the process (the full cycle), the policy (the written rules) and the matrix (who approves which amount).
- Write the policy first, then configure the workflow. Software can route requests but cannot fix unclear authority.
- Assign authority to roles and give each approver a named delegate. The matrix below starts with a project lead and a studio owner.
- Check each project expense against its cost line and the margin you planned when you priced the work.
Table of Contents
- What an expense approval workflow actually covers
- The steps from request to reimbursement
- Build the approval matrix
- Write the expense policy on one page
- Which expenses a creative team should route for approval
- Where approval workflows stall, and how to fix them
- Connect approvals to the project budget
- How Roadbase fits in
- Perspective
- FAQ
- Sources
What an expense approval workflow actually covers
The terms get mixed up, and mixing them is how teams end up with a policy nobody follows. Keep them apart:
- Approval workflow: the route a request takes, for example from the requester to the project lead to the studio owner.
- Approval process: the whole cycle, from the request or receipt through review, approval or rejection, payment and recording.
- Approval policy: the written rules: what counts as an allowable expense, the limits, the receipt requirements and the deadlines.
- Approval matrix: a table showing who approves each type and size of spend.
The policy is the foundation. The people who write about accounting controls make the same point: the policy has to be documented first and the workflow configured afterward, because software can route requests and keep records but cannot repair unclear authority. If two people each believe the other approves the $1,800 photographer rebooking, no tool will settle it.
There is also a difference between pre-approval (sign-off before the money is spent) and post-spend approval (review of a receipt or reimbursement claim). A freelance illustrator or a rented studio day can require approval before you commit. If the policy lets someone pay for a taxi and claim it back, the reviewer checks the receipt afterward.
The steps from request to reimbursement
Virginia Commonwealth University's procurement office provides an approval workflow guide. Its instructions for expense reports and pre-approvals show how documentation, certification before routing, and designated approval and budget review fit into the process.
A small studio can put those checks into five steps:
- Submit. The requester states what the spend is, which project it belongs to, the amount and the reason. Attach the receipt or the vendor quote. A request without a project code is sent back.
- Check against policy. Check the category, the amount and the supporting document at submission. For a reimbursement, check whether it has already been claimed.
- Approve or return. When approval is required, the designated approver checks that the spend is necessary for the job and fits the relevant budget line. Return an incomplete request with a note saying what to fix.
- Escalate if over the limit. Use the full commitment to find the approval band. If it exceeds the project lead's limit, follow the matrix for studio owner or finance review.
- Pay and record. Pay the approved amount and record it against the project. If the expense is billable under the agreement, keep the record with the client invoice.
Where does it go wrong? A request can sit at step 2 until someone checks the paperwork, or at step 4 when the approver is on vacation.
Build the approval matrix
An approval matrix is a table that answers one question: who signs off on this amount of this kind of spend? Keep it small. Use a few bands that people can remember when they are about to commit to a purchase.
Here is an example for a ten-person creative agency. The amounts are illustrative: set yours from your own typical project size and your appetite for risk.
| Total commitment | Approver | Receipt or document | Target turnaround |
|---|---|---|---|
| Under $100 | Delegated to the purchaser for routine spend allowed by policy | Receipt within 7 days | No advance review |
| $100 through $1,000 | Project lead | Receipt or vendor quote | 2 business days |
| Over $1,000 through $5,000 | Project lead, then studio owner | Written quote, linked to the project budget | 3 business days |
| Over $5,000 | Studio owner, with pre-approval | Signed quote or contract | 5 business days |
Glencoyne's startup guide gives examples of thresholds for routine spend, operating costs and major investments, including under $500 for routine low-risk spend, under $5,000 for significant operating costs and over $25,000 for major investments. Set thresholds that fit your own projects and give authority to roles so the matrix survives staffing changes.
Three design rules keep a matrix honest:
- Measure the full commitment. A $900 monthly retainer for a freelance developer adds up to $10,800 if you agree to a 12-month minimum. Use the minimum term you actually agreed to when you select the band. Accounting practitioners recommend that thresholds reflect the total commitment rather than one bill.
- Keep required approvals independent. If the studio owner requests a purchase that requires approval, send it to an alternate who has authority for that amount, such as a designated partner.
- Review it once a year or when projects grow. If a typical project goes from $8,000 to $25,000, check whether routine purchases now end up with the studio owner.
Write the expense policy on one page
The policy does not need to be long. It needs to be specific enough that a new designer can answer "can I buy this?" without asking. A one-page version covers:
- Allowable and non-allowable expenses. Software and plugins, stock assets, fonts, printing and proofs, contractor fees, travel to client sites, meals with clients. State what is never reimbursed.
- Limits by category. Hard caps work best where amounts are large and prices are public, such as airfare and lodging. Ground transport and small purchases usually do not justify the effort of exception review.
- Documentation. Which spend needs a receipt, which needs a quote, and which needs a client-approval email before you commit.
- Who approves what. Paste the matrix in.
- Deadlines. How many days after the expense the claim must be submitted, and how long approvers have to answer.
- Exceptions. Who may grant one, what proof they need and how it gets logged. Without a formal exception route, people invent workarounds that bypass the controls.
- Consequences. What happens with falsified or repeatedly late claims.
Writing authority by role matters more than it seems. A policy that says "Maria approves freelancer invoices" breaks when Maria goes on leave. One that says "the project lead approves freelancer invoices up to $1,000" keeps working.
Which expenses a creative team should route for approval
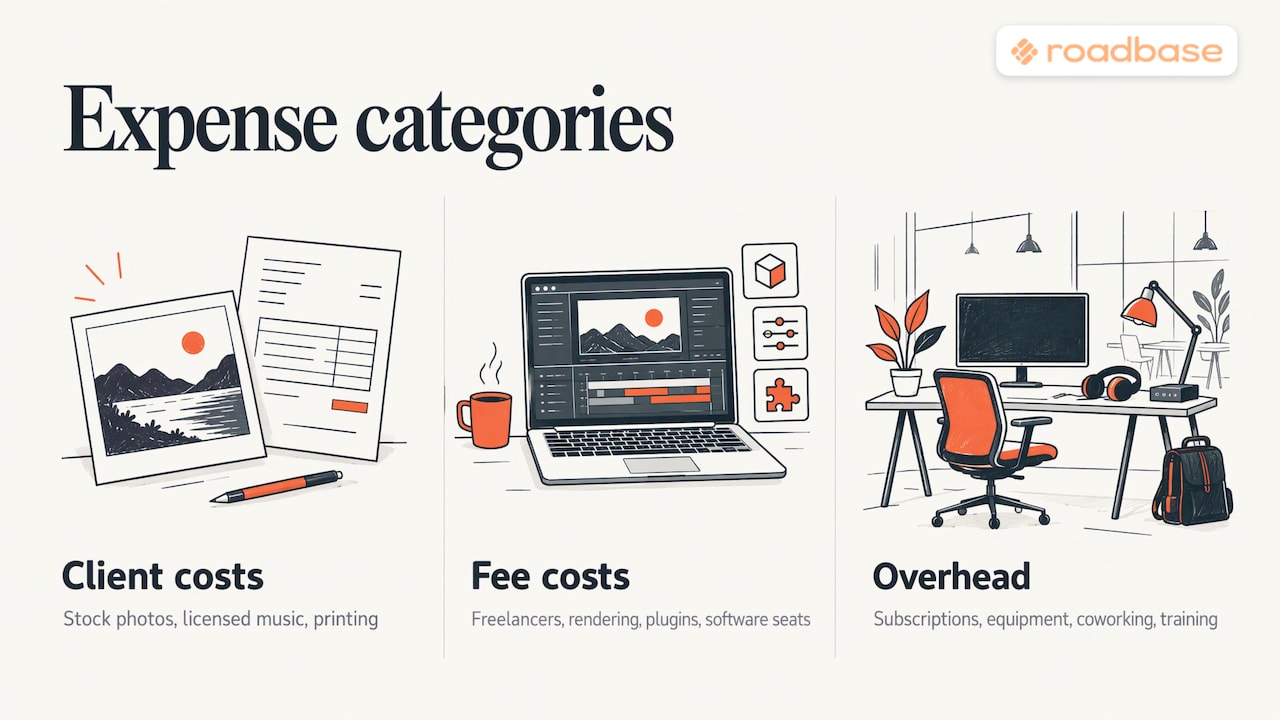
Creative work has a pattern of spend that general guides rarely mention. Sort yours into three buckets:
Pass-through costs billed to the client. Stock photography, licensed music, printing, ad spend, production vendors. Follow the terms you agreed with the client. If those terms require written approval before purchase, get it before committing. Record the cost against the project so it can be matched to the invoice.
Delivery costs absorbed in your fee. Freelance designers and developers, rendering time, plugins and extra software seats. Compare these with the amounts you priced into the quote. Spending beyond that allowance can reduce the margin you planned.
Overhead. Subscriptions, equipment, coworking, training. These do not belong to a single project, so route them to the owner and review them as recurring commitments, not one-off payments.
For a recurring $1,000 software bill, check the full commitment when you approve the contract and match subsequent bills to that approval. For a first purchase from a production vendor, check the quote and confirm who can sign off before you commit.
A short approver checklist
Whoever approves should run the same quick review every time:
- Does the date match the work period?
- Is the receipt or quote attached?
- Is there a clear business purpose, with attendees named for client meals?
- Is the amount within the category limit?
- Is it coded to the right project?
- Has it already been claimed, or paid on a company card?
- Is the total within your approval authority?
If a taxi receipt matches a charge on the company card, check the card record before reimbursing the claim.
Where approval workflows stall, and how to fix them
If a request stalls, check who has authority, whether the paperwork is complete, and when someone should follow up.
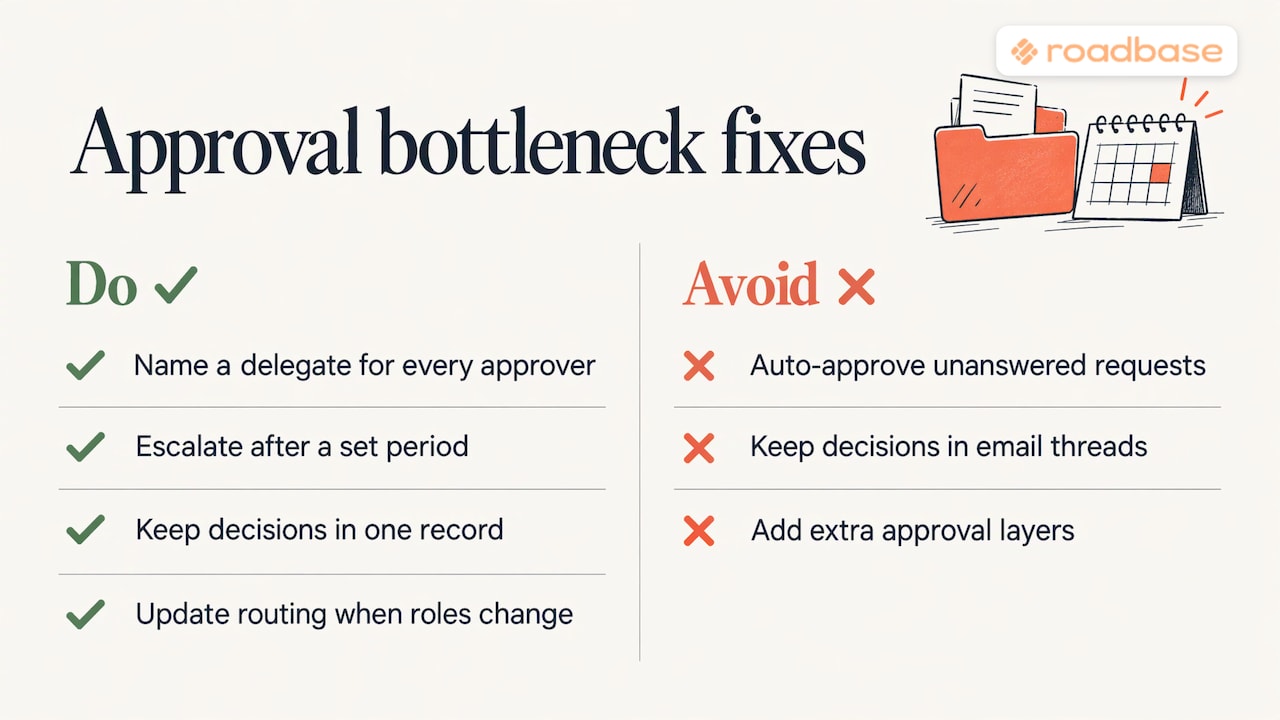
Name a delegate for every approver. Corpay gives an example of a named delegate and escalation after a set period, such as three business days. Set a deadline that suits the purchase and make sure the delegate can act on it.
Escalate when the time limit passes. Send an overdue request to an alternate with the same authority and keep it pending until someone authorized records a decision.
Keep the decision in one place. If you work by email, use it to send requests and reminders, and log the decision, approver and date in a shared record.
Start with the project lead and studio owner. If another reviewer is needed, write down what that person checks. A producer, for example, could verify the terms of an unusually large vendor commitment.
Fix the data behind the routing. If your list of who reports to whom is stale, requests go to the wrong person. Update it whenever a role changes.
If routine requests repeatedly miss the deadline in your policy, look for the step where they sit. That tells you whether to fix the request form, the routing or the escalation.
Connect approvals to the project budget
When a $1,200 print quote comes in, check what is left in the project's printing budget. If there's $1,000 left, the lead can price a different print option or calculate what spending another $200 would do to the planned margin before routing the request.
That only works if the budget exists before the spending starts. If you have not yet mapped costs, start with a project budget breakdown, so each approval has a line to be compared with. When a client asks for something outside the original scope, use a change request with a scoped estimate to document and price the additional work for approval before you commit. For labor costs, use the team's recorded hours. The guide to timesheet compliance for creative teams covers that part of the record.
How Roadbase fits in
Have a brief, project notes or a PDF for your next job? Paste the text into Roadbase or attach the PDF to draft a work breakdown with roles, estimated hours and timing. Review the draft and adjust it for the job. Use your role costs and rates, then add expected direct expenses such as printing or licensing as quote inputs. Review those costs alongside labor, overhead, contingency and target margin, and export the reviewed plan and quote as a proposal PDF.
Open Roadbase using the image below. You can also see the available plans on the pricing page.

Perspective
An approver needs a number to compare with the request. A print quote may be reasonable on its own. If the priced allowance is already mostly committed to proofs and shipping, the reviewer can see how much is left and have a concrete conversation about what to change before signing off.
A one-page policy gives the lead authority to make that call within an agreed limit. A named alternate and a project code give a backup reviewer the same basis for the decision.
FAQ
What are the steps in an expense approval process?
The core sequence is submit, check against policy, approve or return, escalate if over the limit, then pay and record. Larger organizations add budget-owner and accounts payable reviews. A small studio can assign both checks to one approver within their authority. If the requester is also the approver, route required approval to an authorized alternate.
What should an expense approval matrix include?
Use bands based on total commitment. For each band, list who can buy or approve, the documents required and any turnaround target. Name an authorized alternate for conflicts and review the limits annually or when your typical project grows.
How many approval levels does a small team need?
Start with two approval roles, as in the example above. The project lead handles requests within their limit, and the studio owner handles higher commitments. Routine purchases can be delegated under the policy, with a deadline for submitting the receipt. Add another review when it has a specific purpose.
What is the difference between an expense approval policy and a workflow?
The policy is the written rules: what is allowed, the limits and the documents required. The workflow is the route a request follows to get approved. Write the policy first, then set up the workflow to enforce it.
Sources
- Approval Workflow Guide, Virginia Commonwealth University Procurement Services
- How to Implement Expense Approval Controls, Global Virtuoso
- Payment approval matrix for growing startups, Glencoyne
- Expense Approval Process: How to Design a Chain That Scales, Corpay